
How to Draw a Rabbit
- 8 steps
- Ages 5 and up
- About 15 minutes
- easy
This rabbit drawing is a good choice for children who are learning to turn simple guide shapes into an animal. You only need a pencil, an eraser, and something dark to trace the final lines. Start with the curved back, then add the round head, legs, feet, and face. After that, draw the long ears and fluffy tail. In the last step, go over the lines you want to keep and rub out the dotted guides. The rabbit sits sideways, so the shapes are easy to spot and copy.
What you need: a pencil, an eraser, black pen or dark pencil, plain paper.
Print this guide as a PDF, 324 KB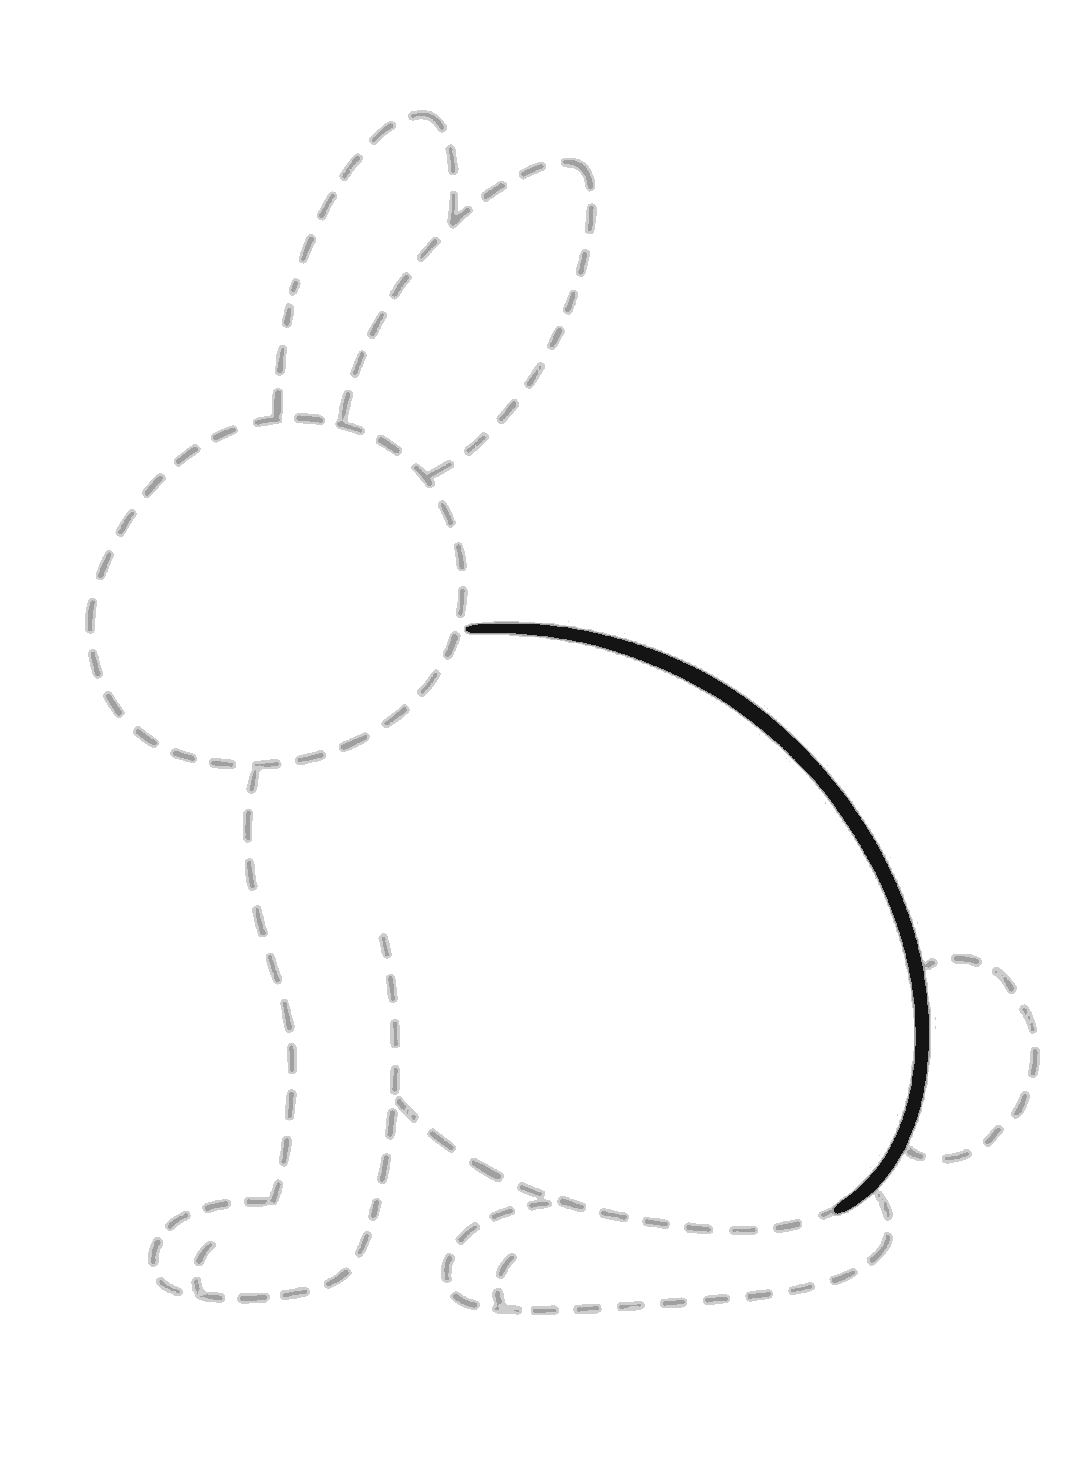
Step 1
Draw the curved back
Draw one long curved line from the neck area down and around to the rabbit's back end. It follows the outside edge of the big body guide shape.
Step 2
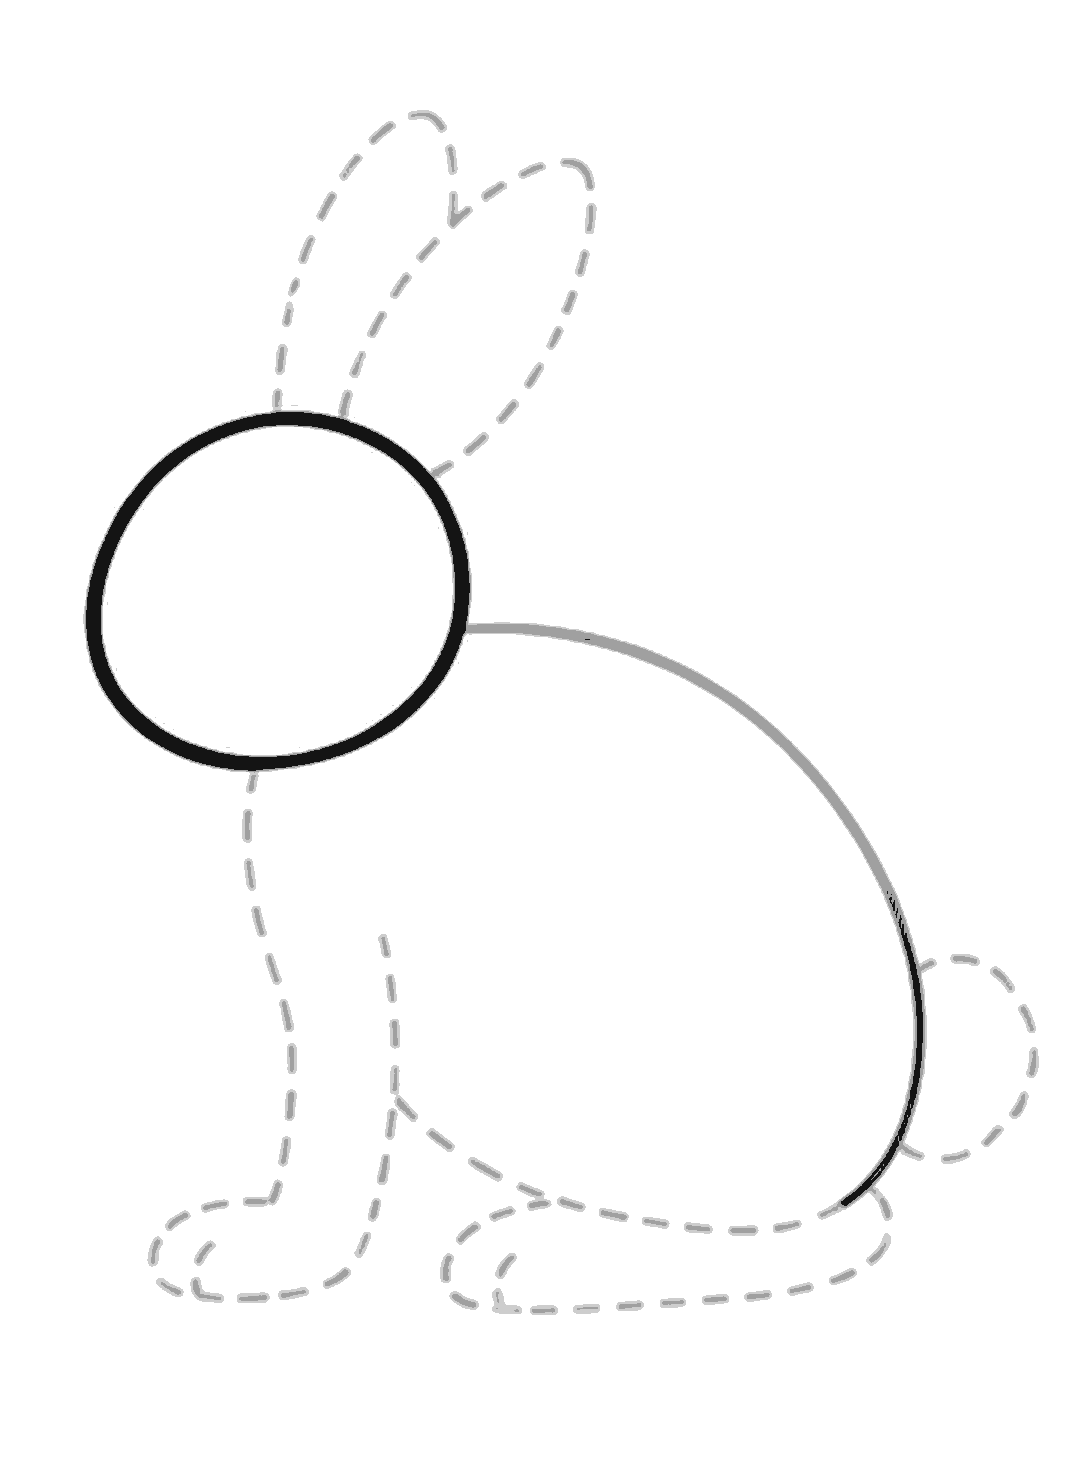
Add the round head
Draw a round head shape on the left, attached to the front of the back line. Follow the head guide circle all the way around.
Step 3
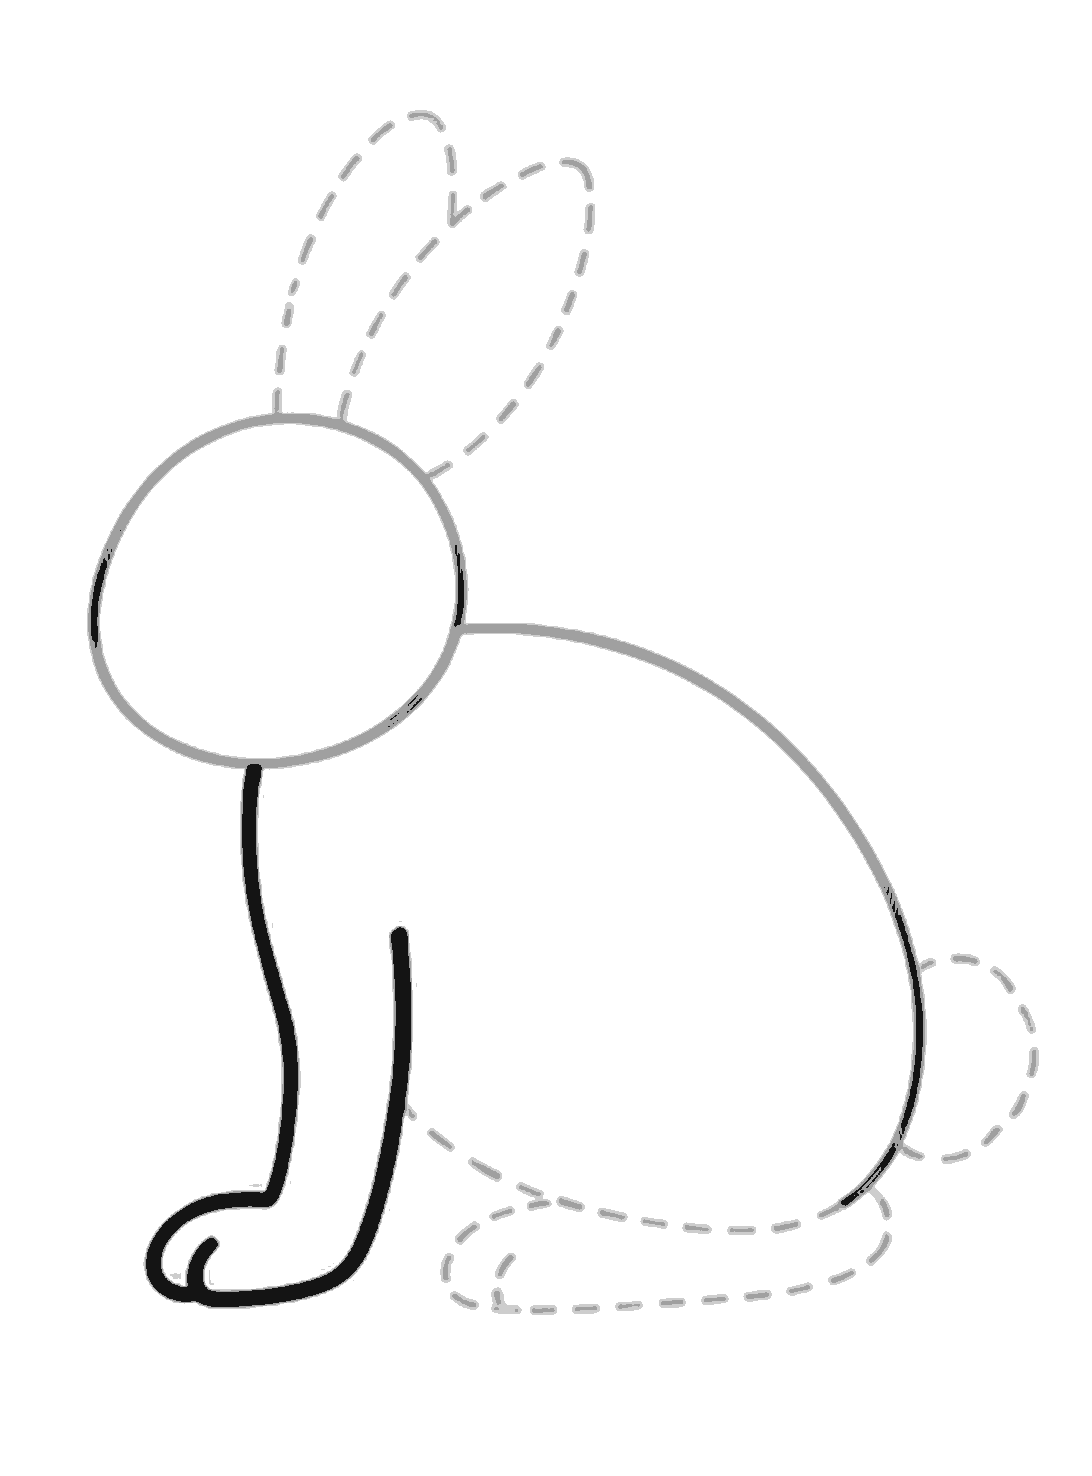
Draw the front leg
Draw the front leg dropping down from the head, then curve into the front paw and back up for the inner leg line. Add two short curved toe lines on the paw.
Step 4
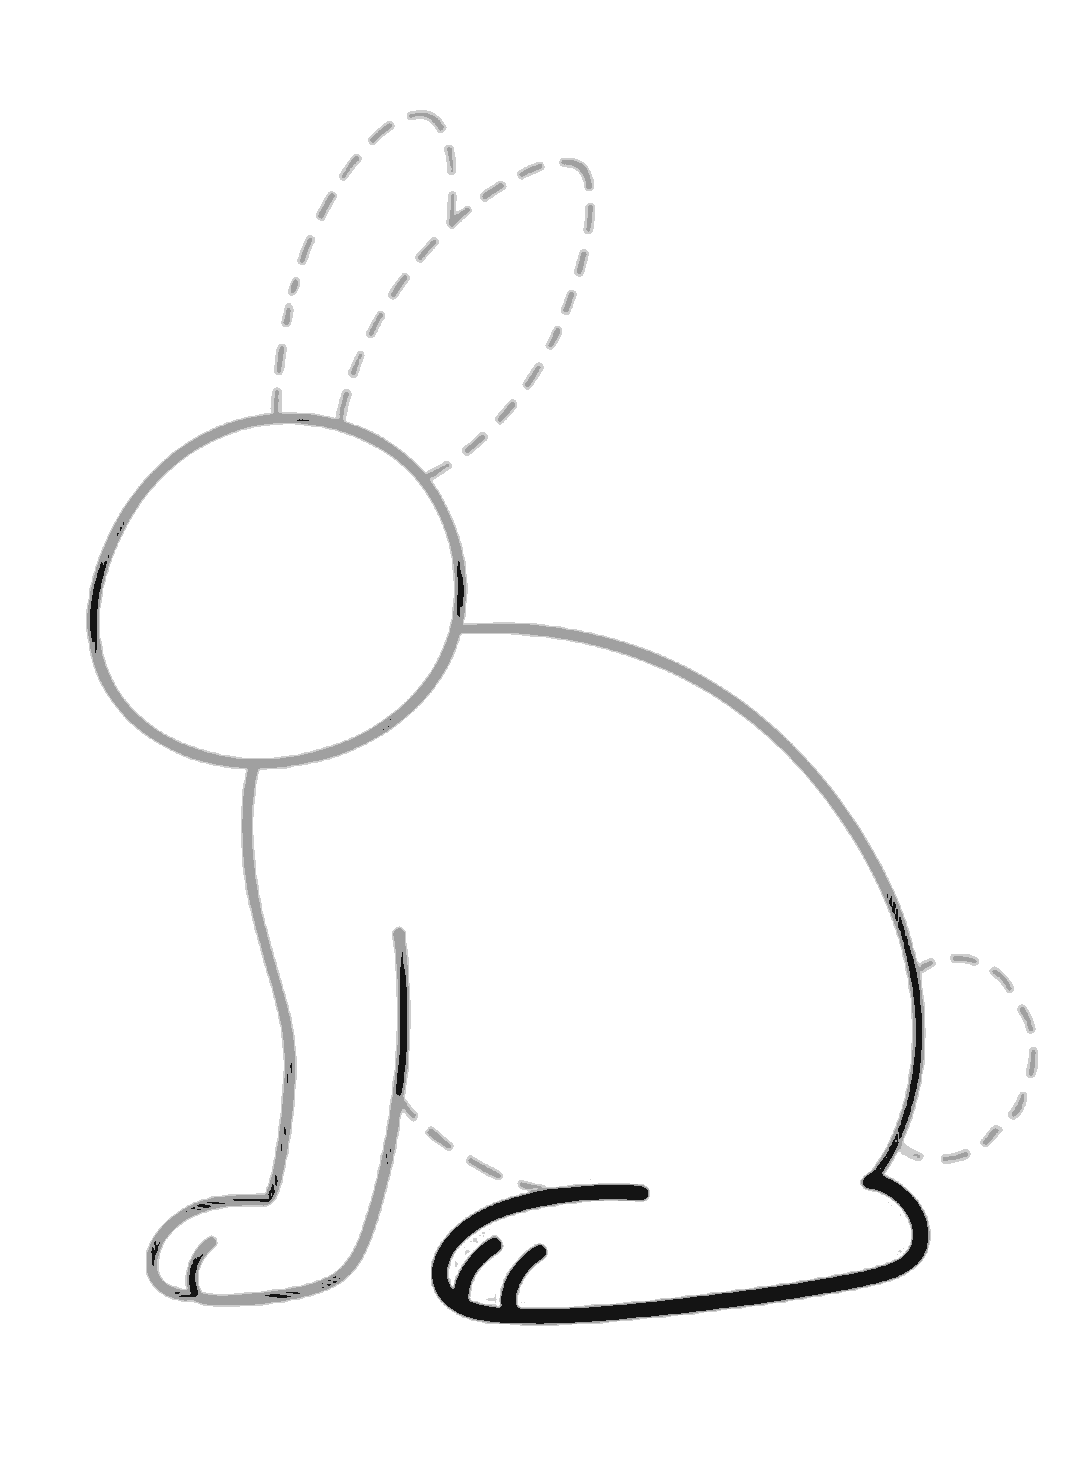
Draw the back foot
Draw the large back foot near the bottom right. Make it long and rounded, with a bump at the heel and two short toe lines at the front.
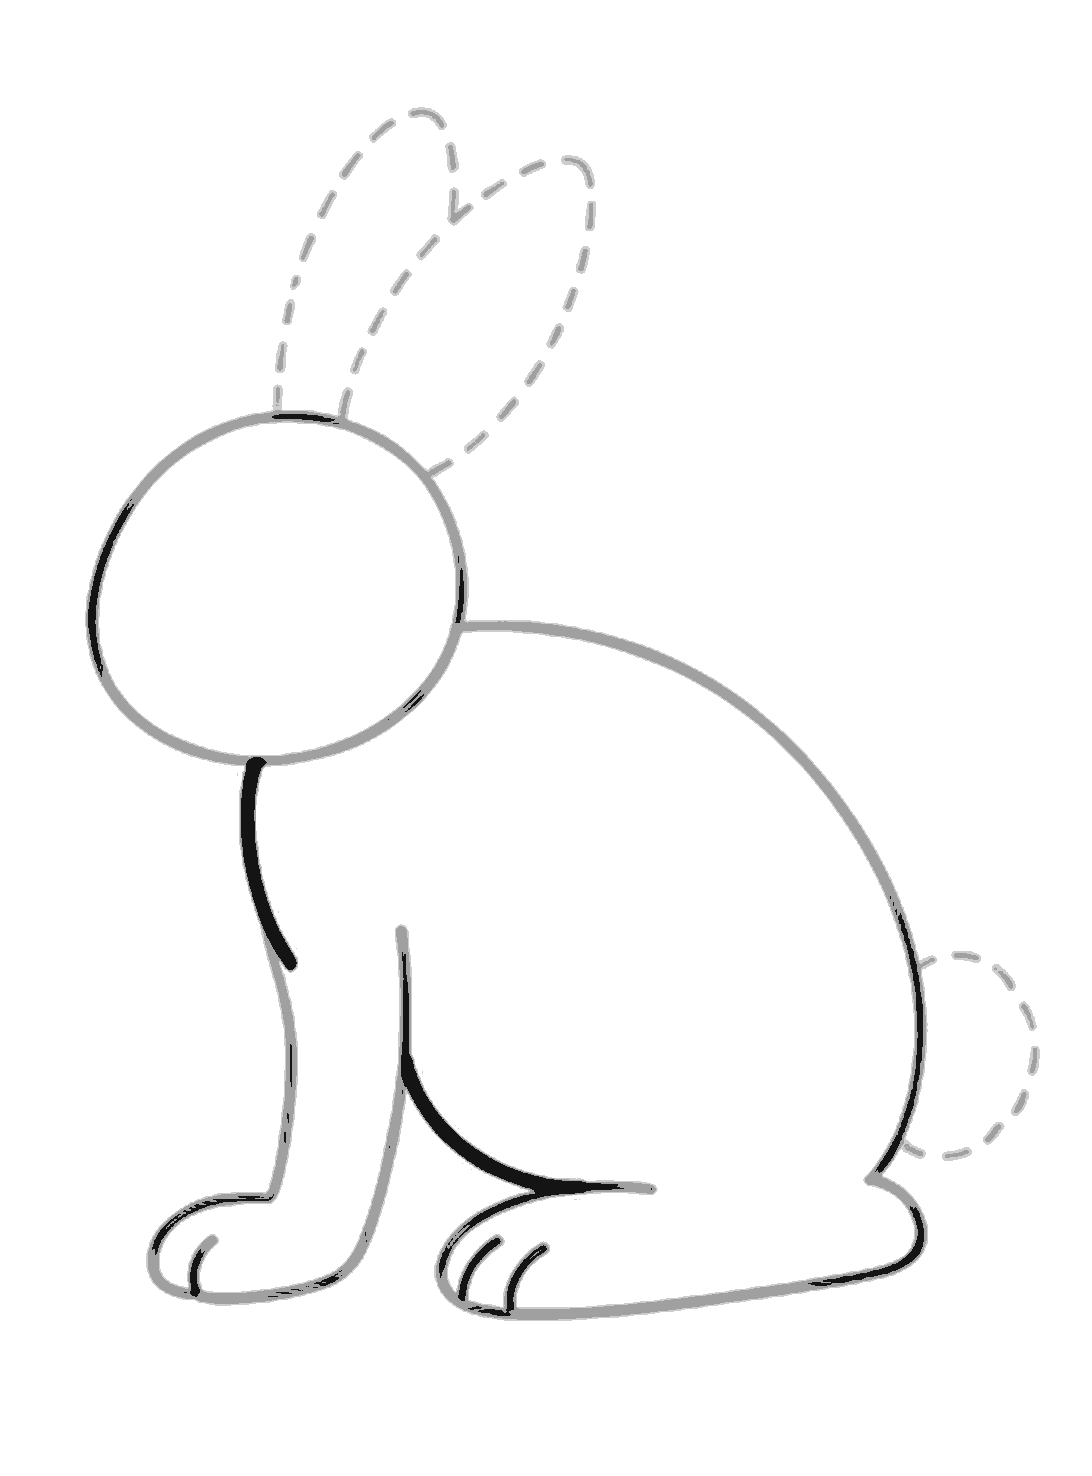
Step 5
Join the body lines
Draw a short curved chest line under the head. Then add the belly curve that runs back to the top of the back foot.
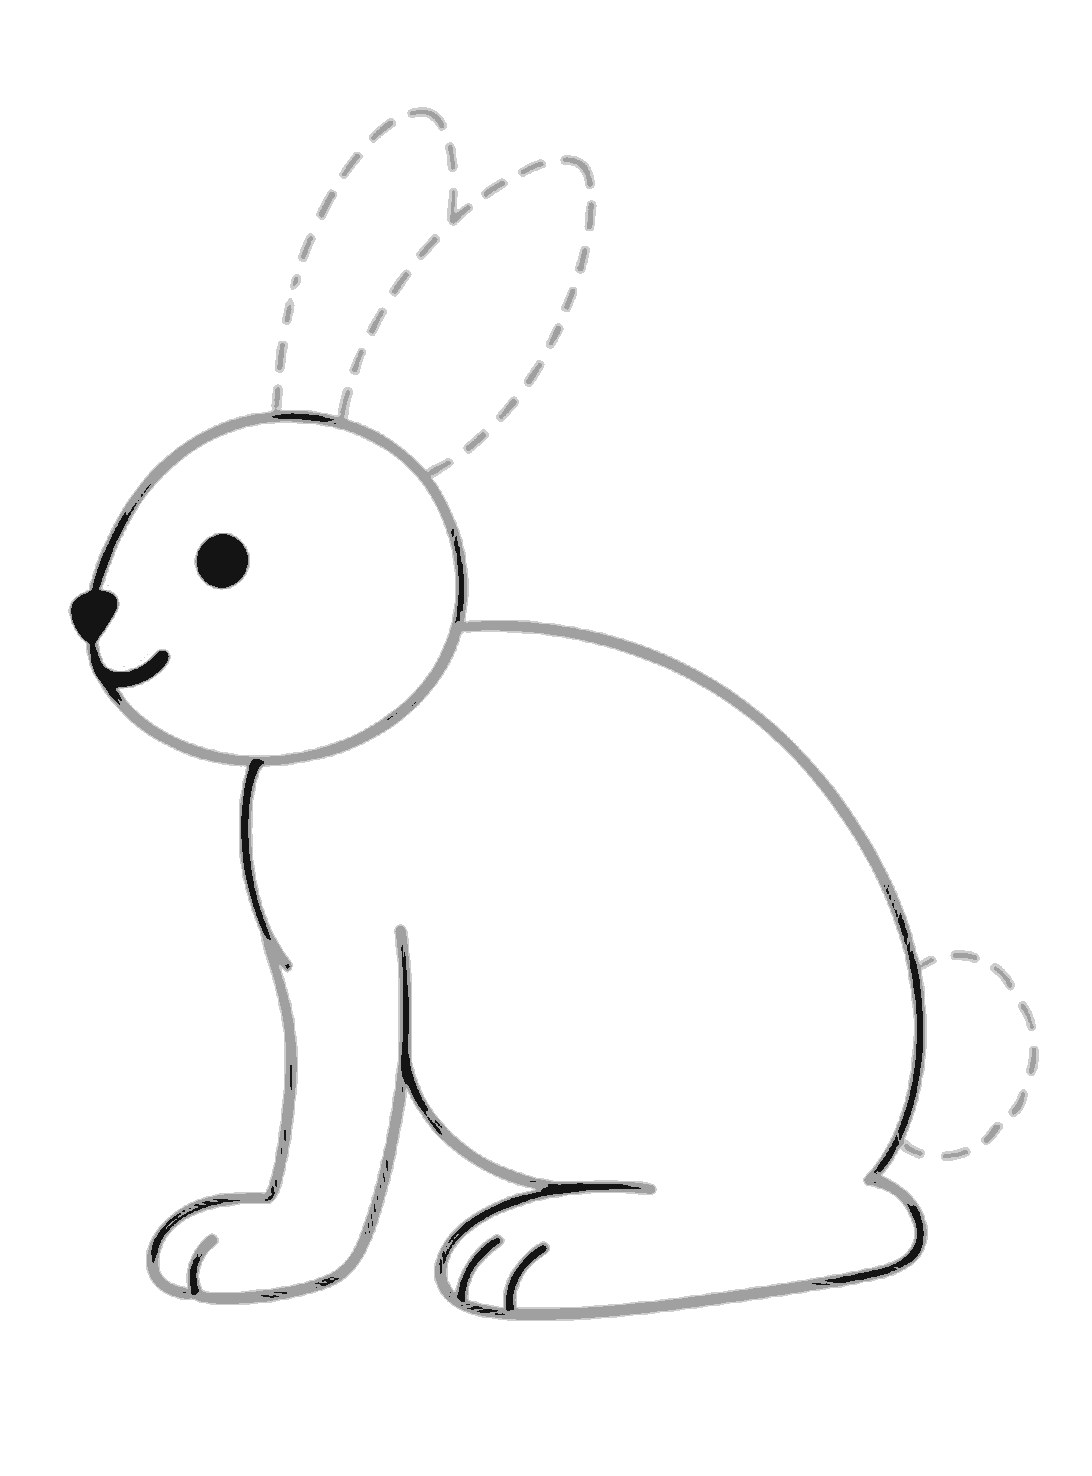
Step 6
Add the face
Draw a small nose at the front of the head, a curved mouth line under it, and a round eye in the middle of the face. Fill in the eye and nose, leaving the tiny white shine spots shown.
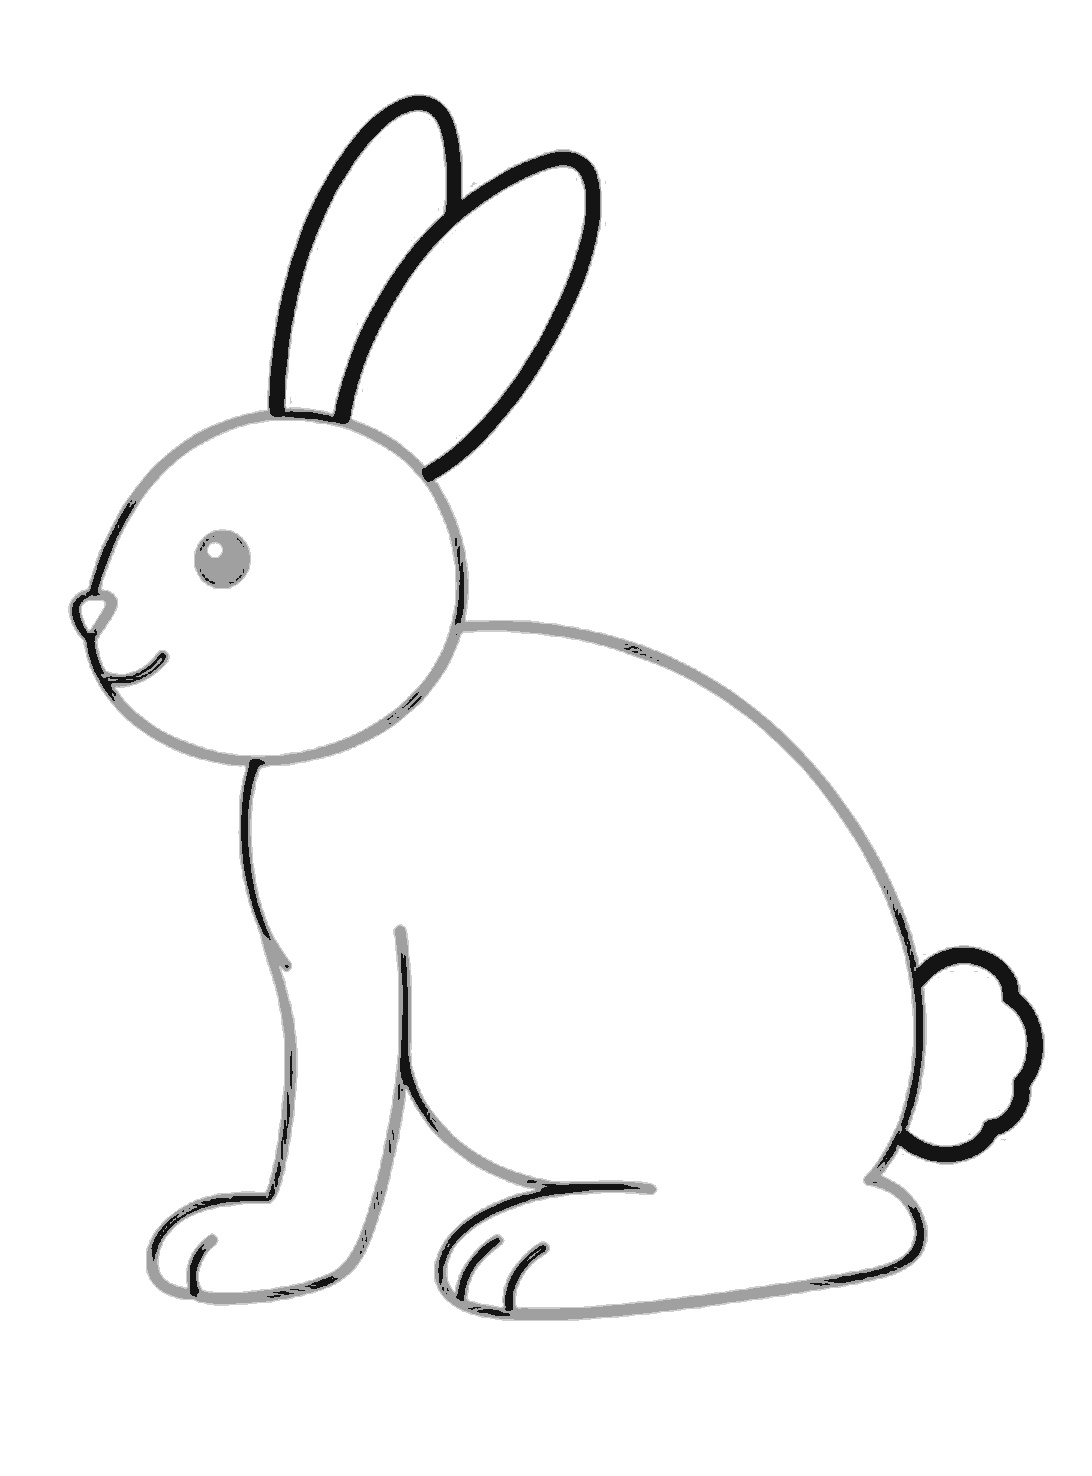
Step 7
Draw ears and tail
Draw the two long ears on top of the head, using the guide shapes. Then add the fluffy tail at the back with a bumpy cloud-like outline.
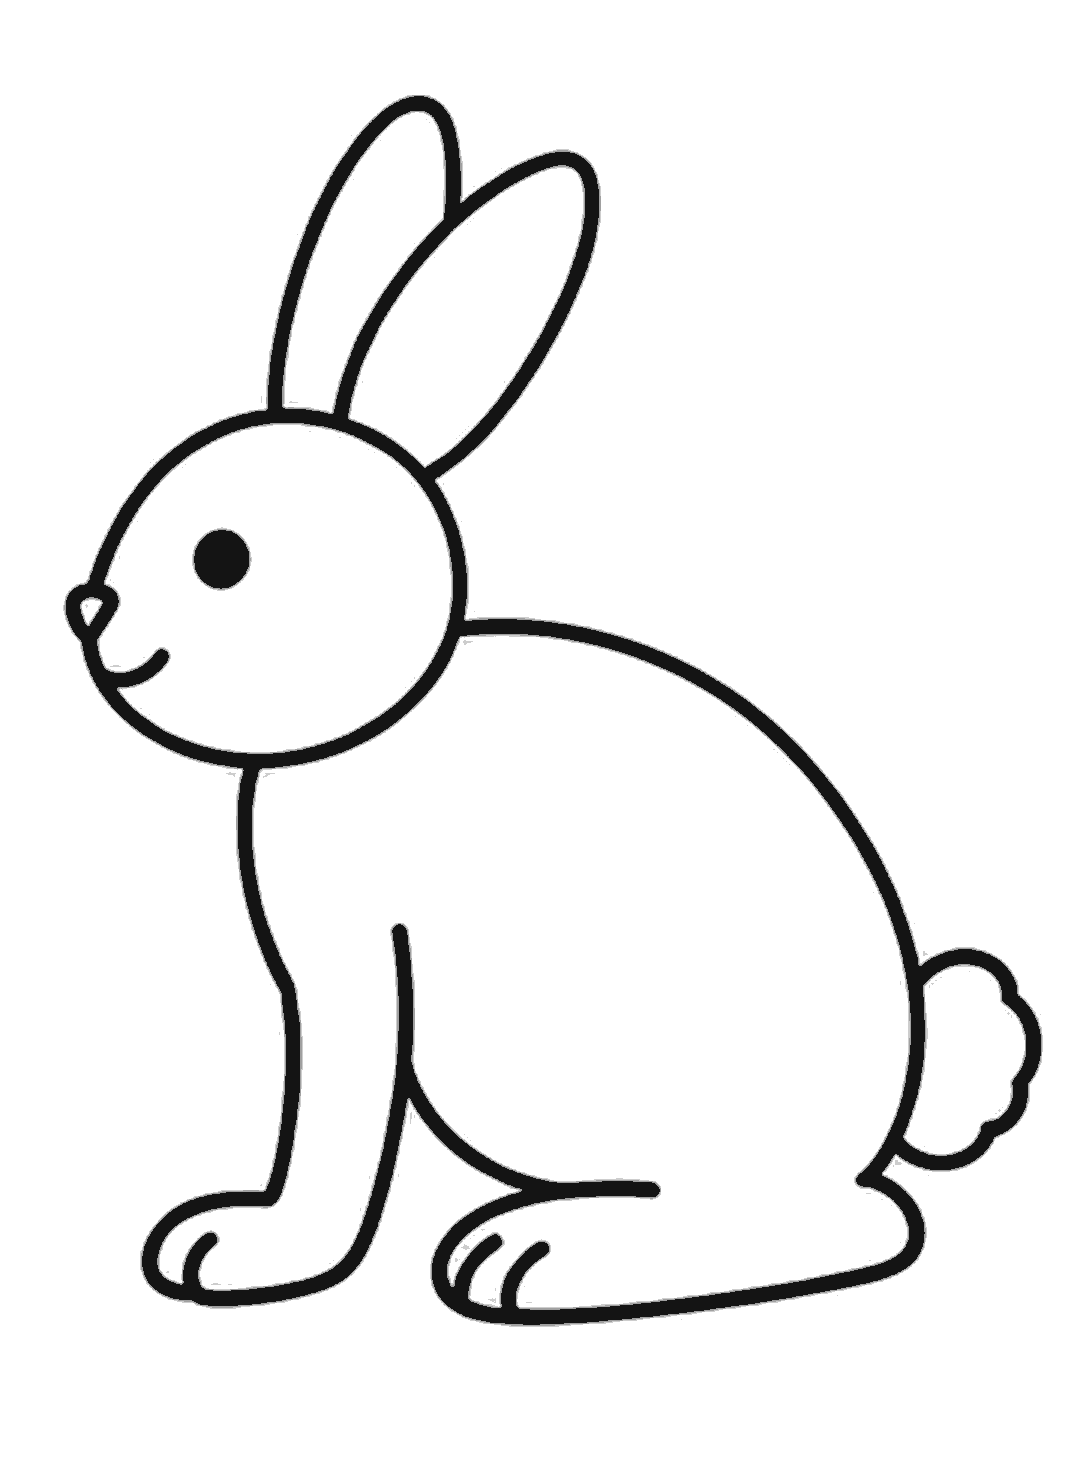
Finished
Trace and rub out guides
Go over all the lines you are keeping with a darker pencil or pen. Rub out the pale dotted guide shapes so the finished rabbit looks clean and clear.
Tips for this one
- Keep the guide shapes light so they are easy to rub out later.
- Make the back foot bigger than the front paw so the rabbit looks balanced.
- If a line looks wobbly, draw it again with one slow smooth curve.
Now try this
- Draw the rabbit holding a carrot.
- Add grass and flowers under its feet.
- Turn the head a little and make one ear flop down.
Questions
- Why does the rabbit start with guide shapes?
- The guide shapes help you place the head, body, ears, and feet in the right spots. They make the rabbit easier to build one part at a time.
- My rabbit looks too thin. What should I do?
- Make the body curve wider and rounder, especially along the back and belly. You can also make the back foot a little larger to give it a softer shape.
- Do I have to use black for the final lines?
- No. A dark pencil works well too. The main thing is to keep the final lines easy to see after you rub out the guides.