
How to Draw a Horse
- 12 steps
- Ages 7 and up
- About 20 minutes
- medium
This horse is a good drawing for children who like animals and simple shapes. You start with light guide shapes, then add the head, ears, legs, face, mane, and tail one step at a time. Each new step uses the black lines in the picture, so it is easy to see what to draw next. At the end, go over the lines you want to keep and rub out the pale dotted guides.
What you need: a pencil, an eraser, black crayons or a black pen, paper.
Print this guide as a PDF, 397 KB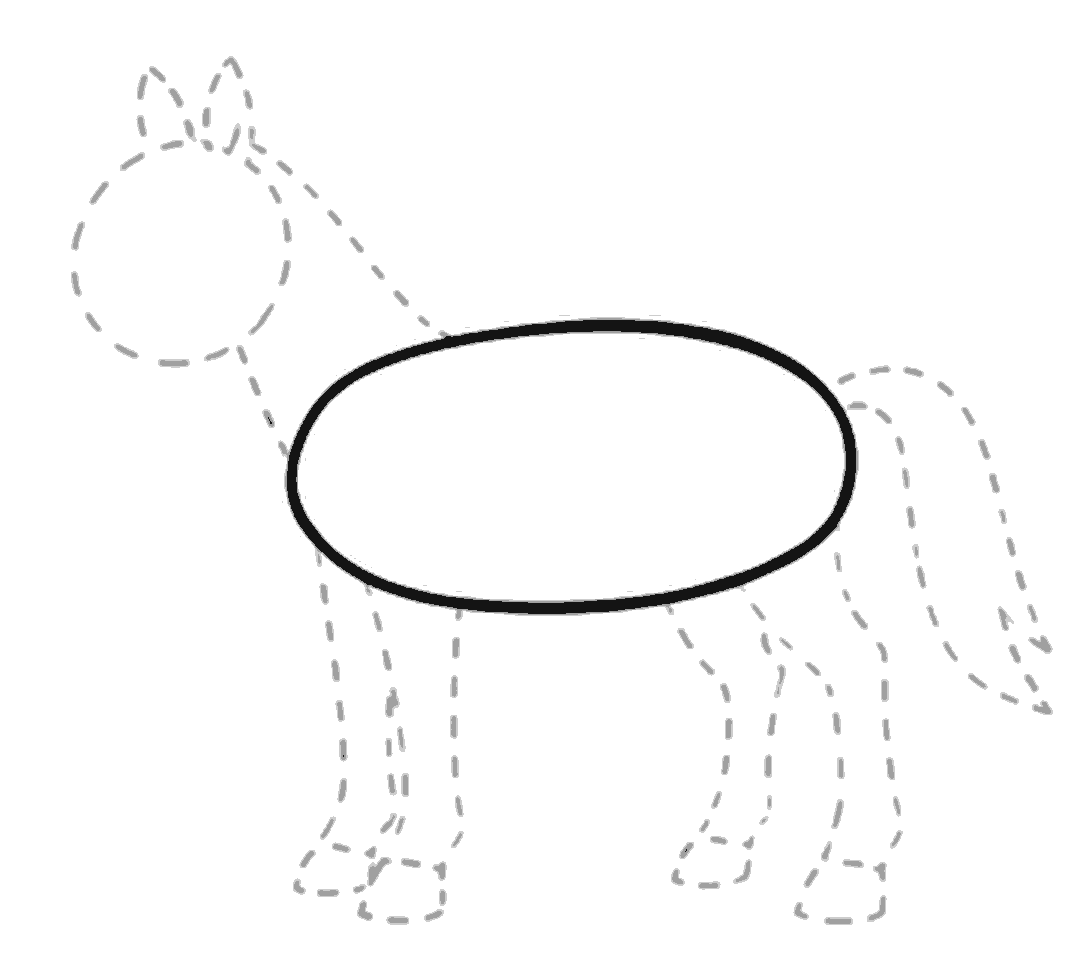
Step 1
Draw the body oval
Draw one large oval across the middle for the horse's body. Keep it smooth and wide.
Step 2
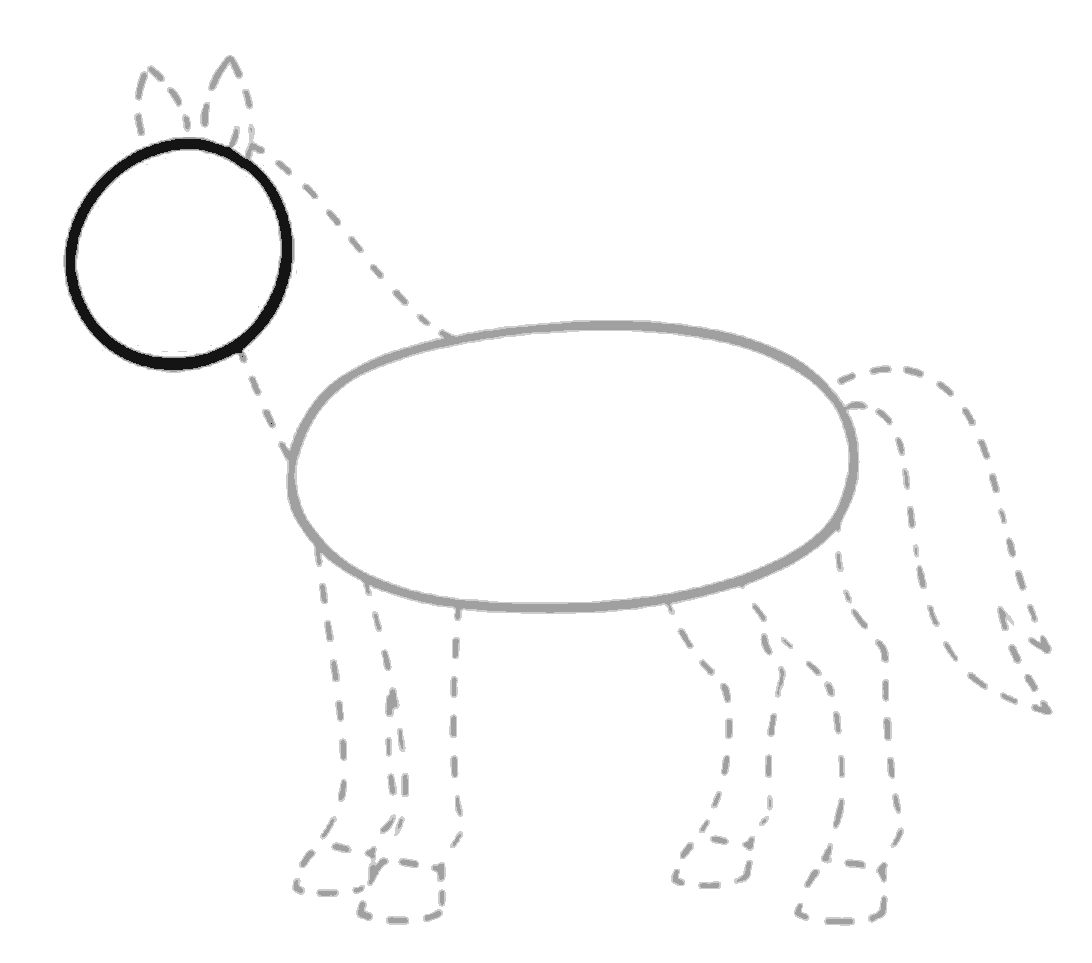
Add the head circle
Draw a round circle at the upper left for the head. Leave a gap between the head and the body.
Step 3
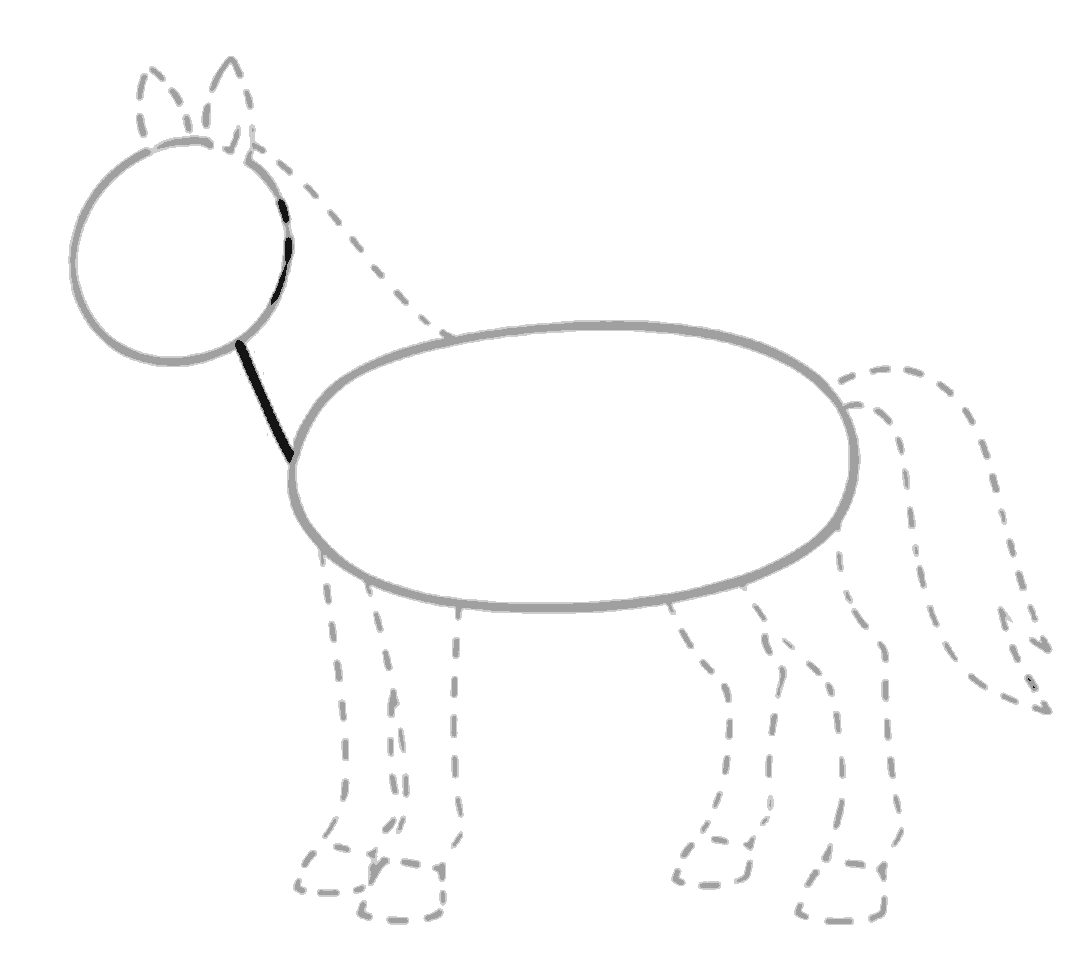
Draw the neck line
Add a slanted line from the lower right side of the head down to the front of the body. Then add a short curved line on the right side of the head for the face edge.
Step 4
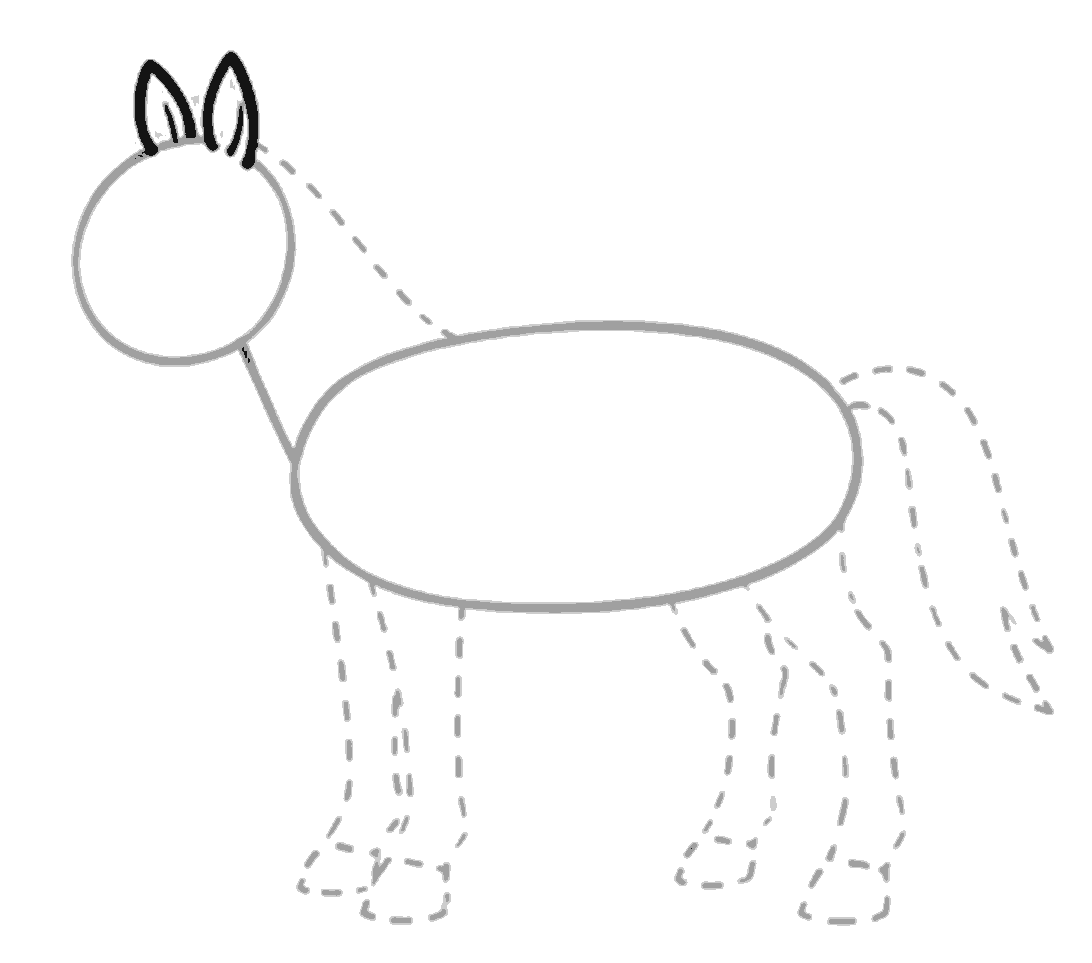
Draw both ears
At the top of the head, draw two tall pointed ears. Add a smaller line inside each ear.
Step 5
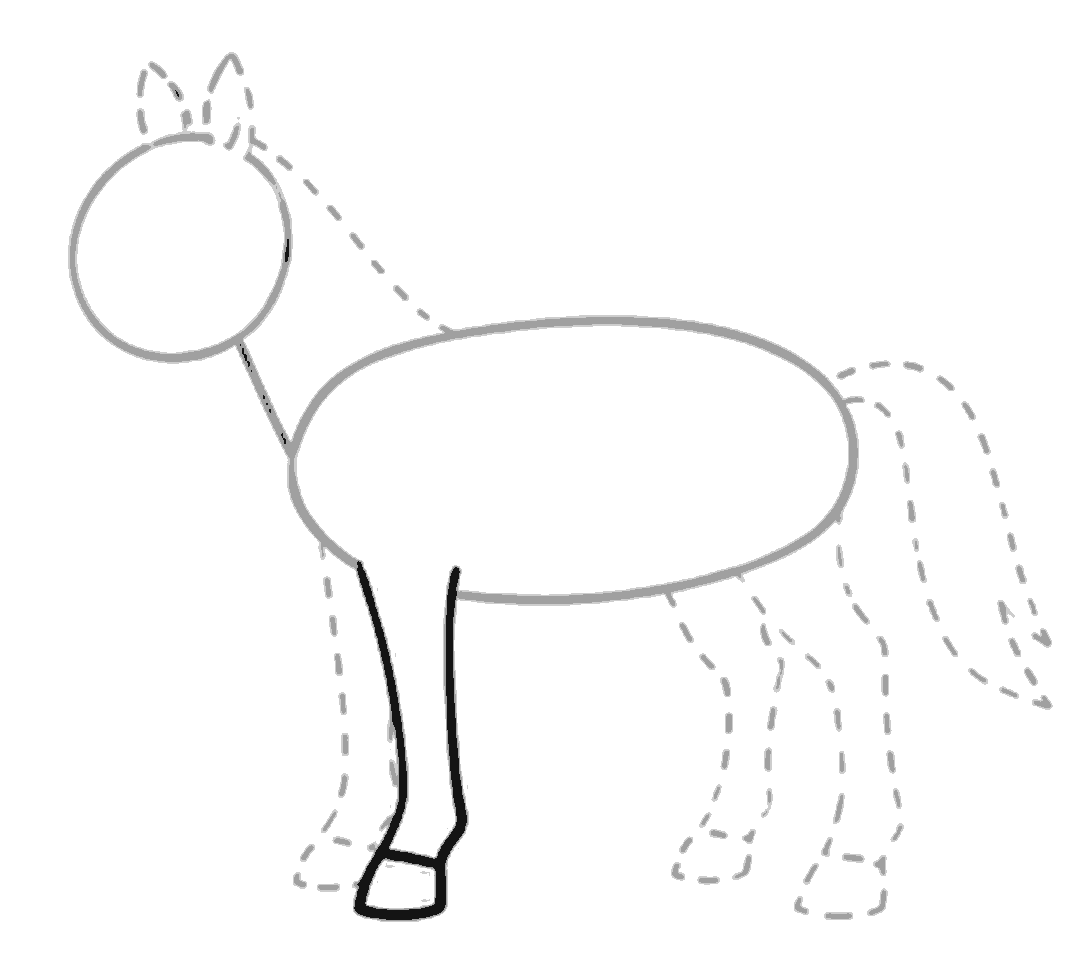
Draw the front leg
Draw the front leg that is closest to us. Start under the body, curve in at the ankle, and add the hoof with a straight band across it.
Step 6
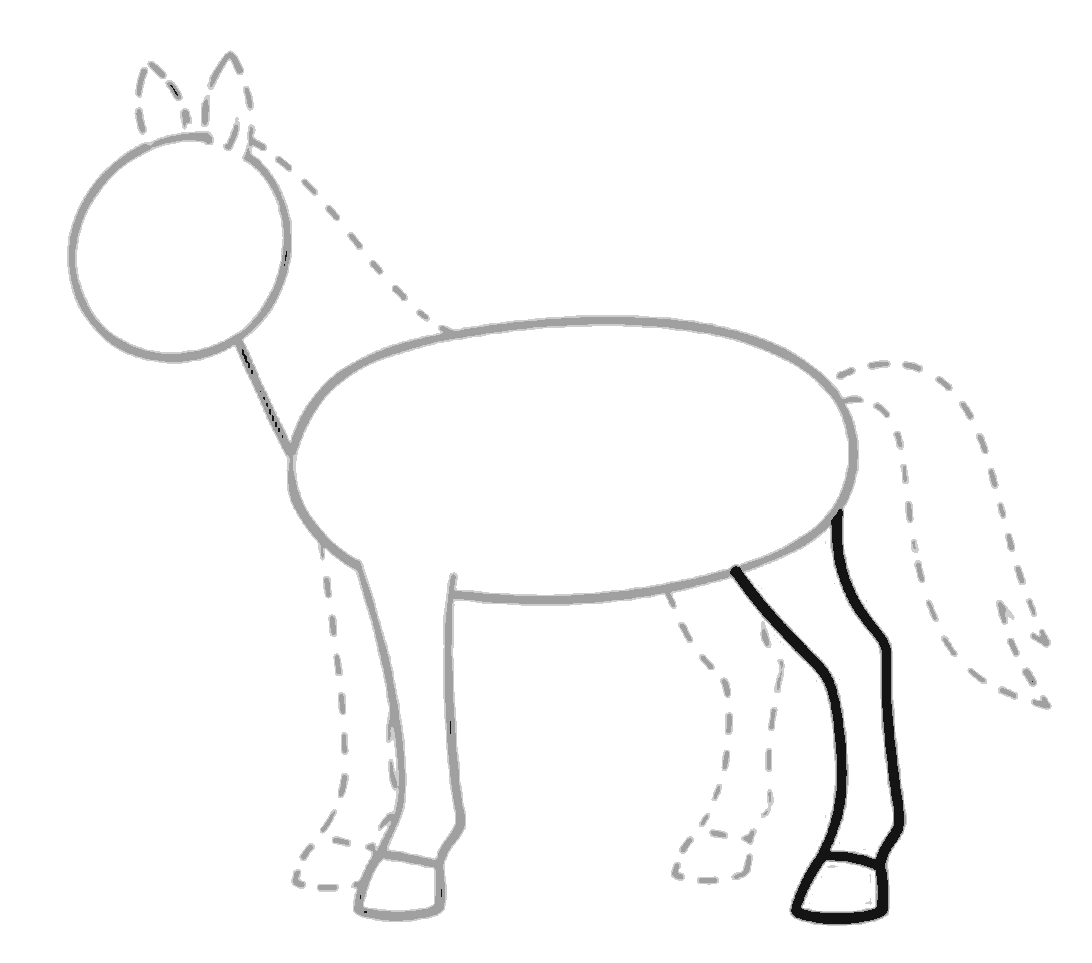
Draw the back leg
Draw the back leg on the right side. Let it bend a little at the middle and add the hoof at the bottom.
Step 7
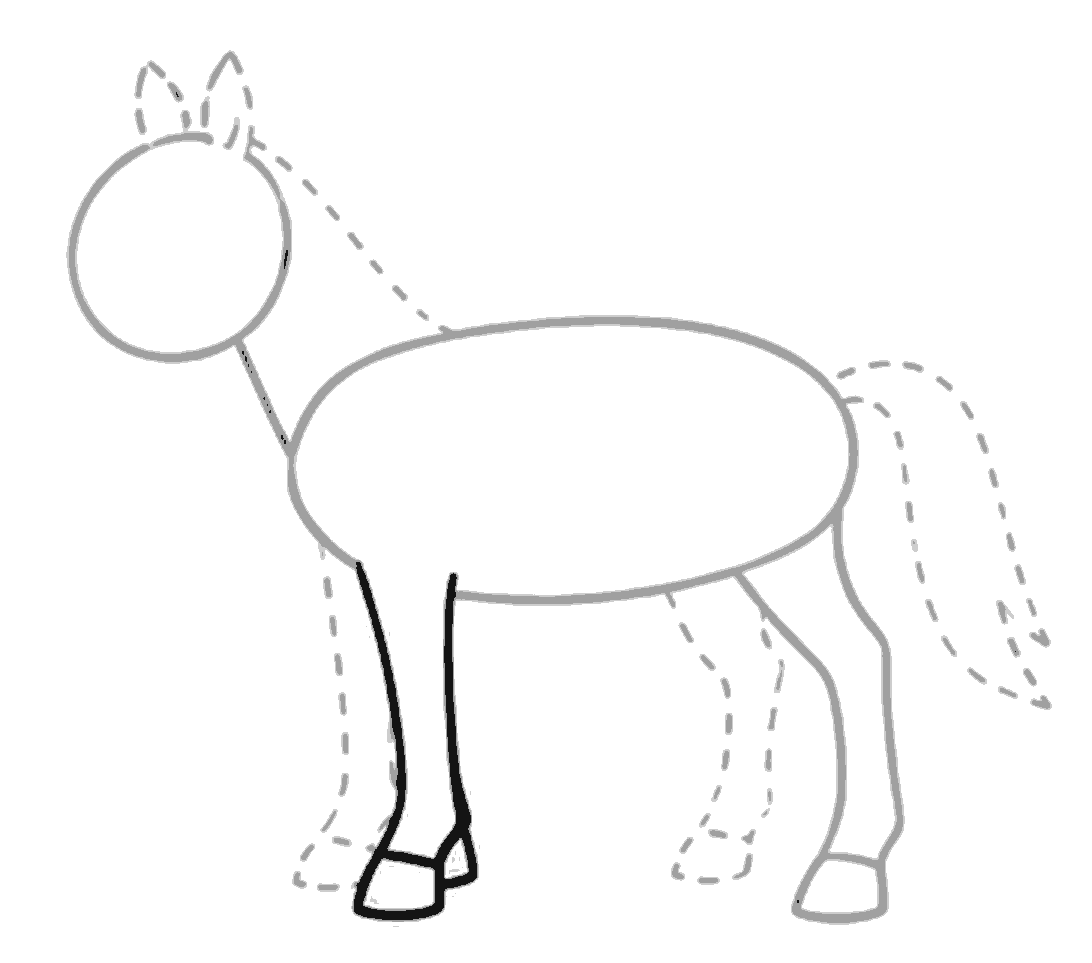
Add the other front leg
Draw the second front leg just behind the first one. Show part of the hoof peeking out beside the front hoof.
Step 8
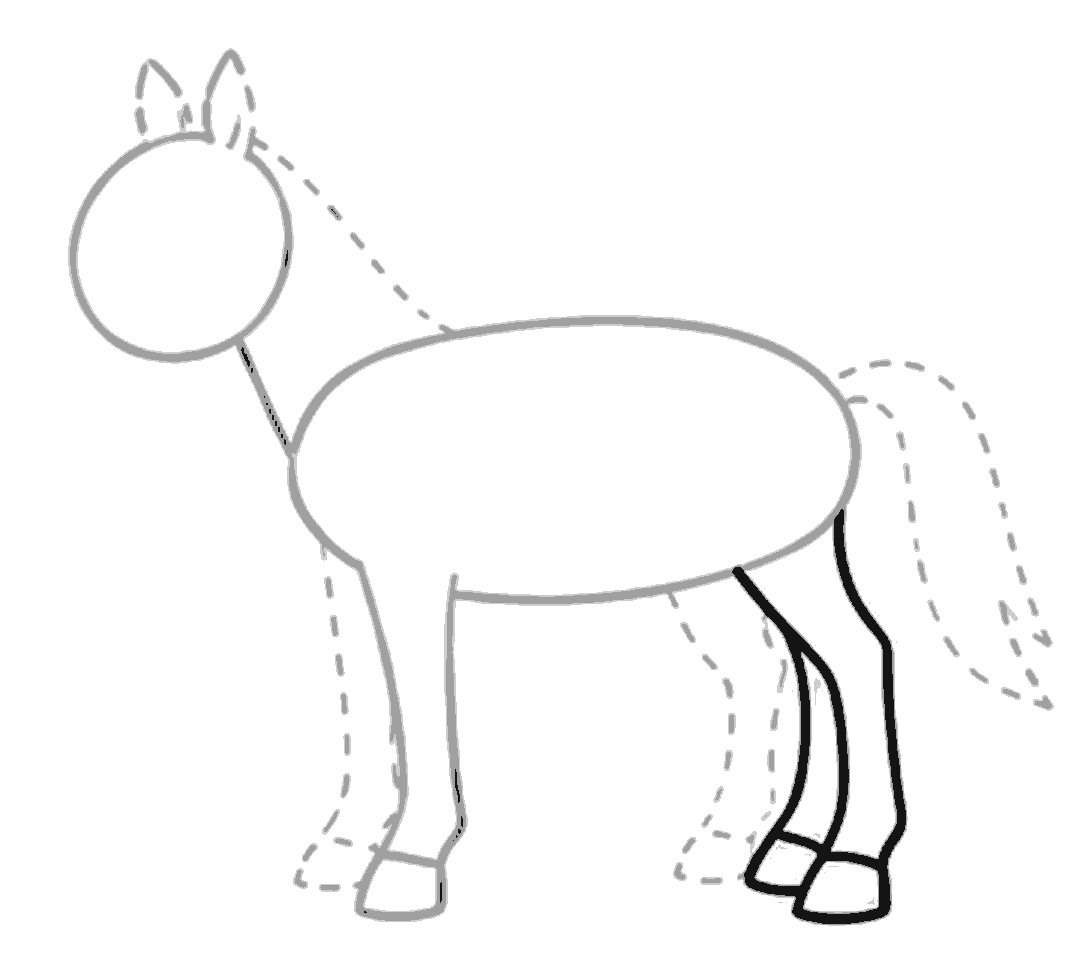
Add the other back leg
Draw the second back leg between the body and the back leg you already made. Curve it down and add a small hoof at the bottom.
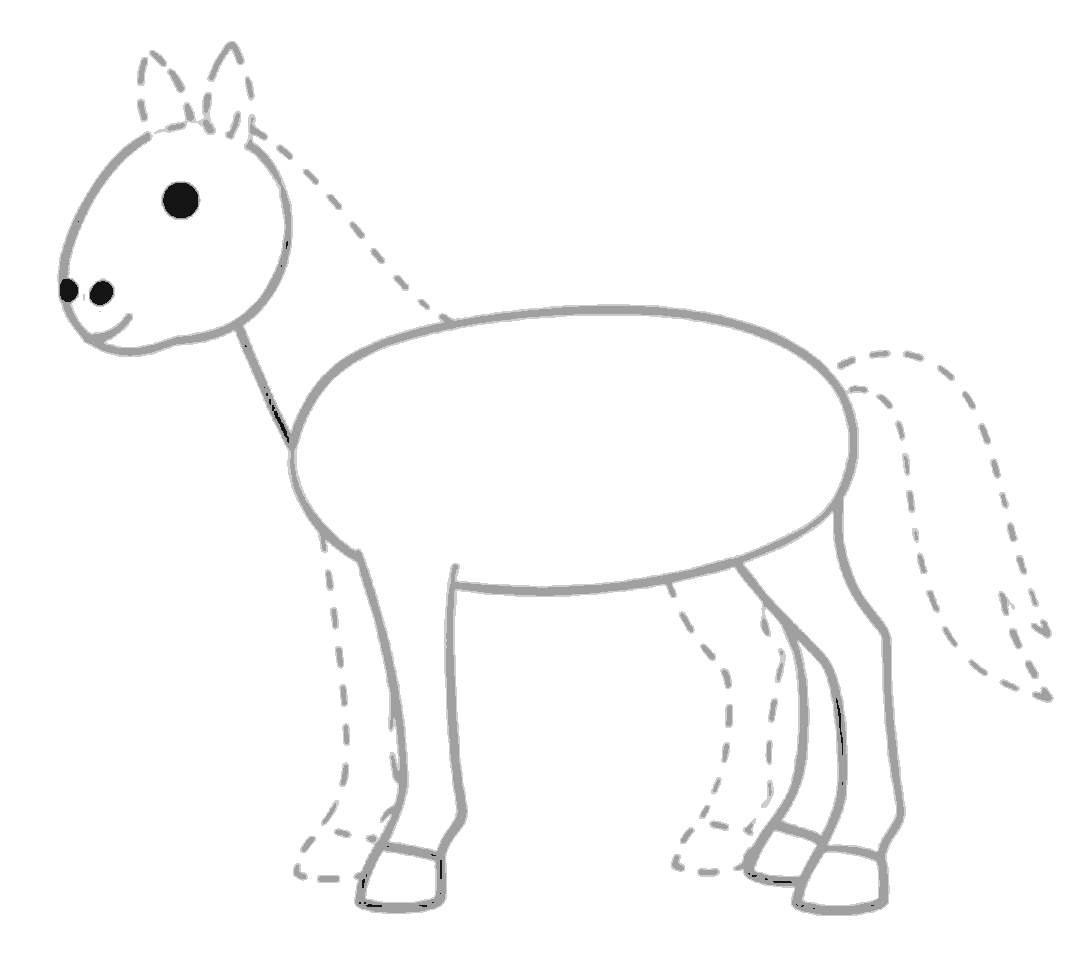
Step 9
Draw the face
Add one round eye, two small nostrils, and a curved mouth. Make the front of the head a little bumpy for the nose and mouth shape.
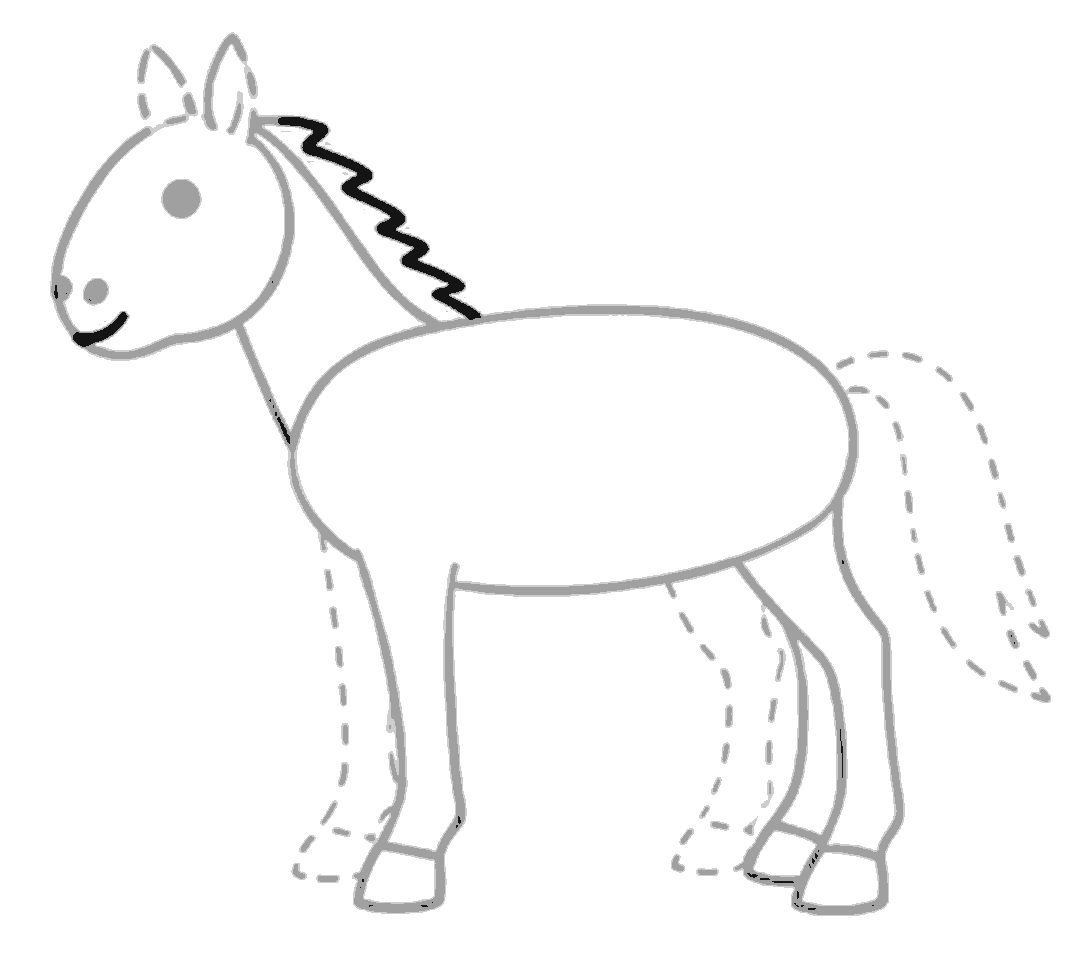
Step 10
Draw the mane
Draw a zigzag mane from behind the ears down the back of the neck. Add a short curved smile line on the muzzle.
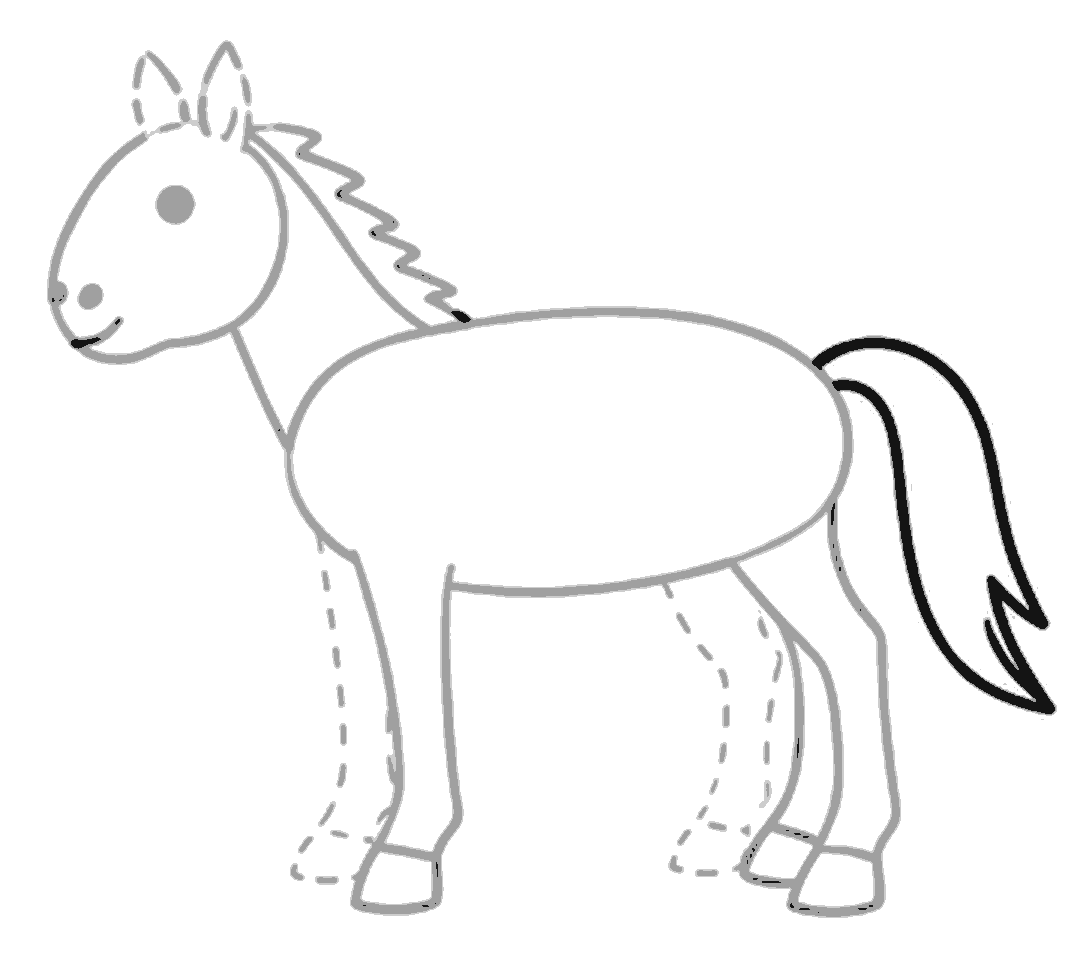
Step 11
Draw the tail
Draw a long tail at the back with two curved lines. Make the end pointed and a little jagged.
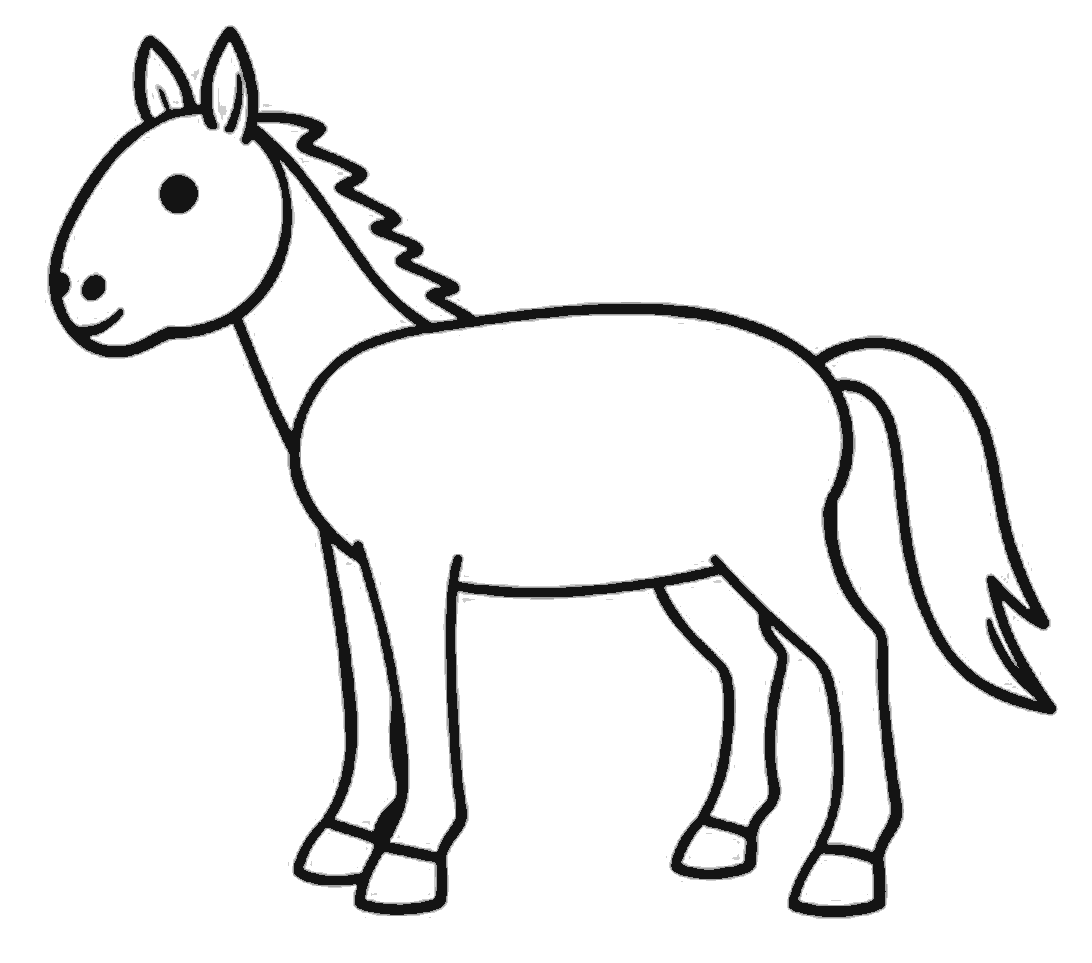
Finished
Finish and clean up
Go over the horse outline, legs, head, mane, and tail with darker lines. Rub out the pale dotted guides you do not need.
Tips for this one
- Keep the first guide shapes light so they are easy to rub out.
- Make the legs a little narrower near the hooves.
- If your horse looks different, that is fine. Real horses do too.
Now try this
- Draw a baby foal beside the horse.
- Add grass, a fence, or a barn in the background.
- Give the horse spots or a long flowing mane.
Questions
- My horse legs look uneven. What should I do?
- Look at where each leg starts under the body and where each hoof ends. You can lightly adjust the leg lines before you darken them.
- Do I have to copy the mane exactly?
- No. You can make the mane more spiky, more wavy, or a little shorter. It will still look like a horse.
- When should I rub out the dotted guides?
- Wait until the main horse lines are all drawn and you are happy with the shape. Then rub out the pale guides slowly so you do not smudge the darker lines.